The following instructions explain how to perform the
modifications.
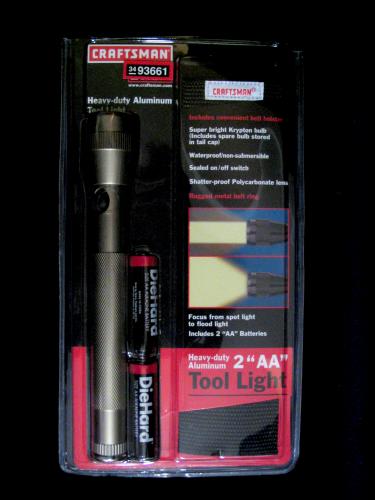
Start with a Sears Craftsman flashlight, available at your local Sears for about $11.
The Sears light is a 2-AA flashlight, much like a Mini-Maglite.
It differs primarily by having a separate button for power instead of
having the screw-down reflector also control power like the Maglite
does. This is the advantage. On a Maglite, it's very difficult to
remove the reflector; if it is removed, it must be replaced with
something else which can press the power switch. The Sears light, at
the expense of being slightly longer, does not have this limitation.
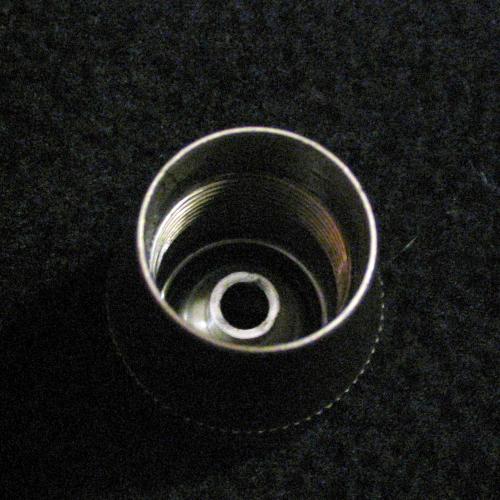 First, unscrew the head of the flashlight which contains the
reflector. The reflector will need to be removed to make space for
the LEDs. It looks like it was originally put in from the front, but
I've had more luck removing it from the back with needle-nose
Vise-Grips. Just grab the small center hole, make sure you have a
good grip, and pull. This step is not reversible. :)
First, unscrew the head of the flashlight which contains the
reflector. The reflector will need to be removed to make space for
the LEDs. It looks like it was originally put in from the front, but
I've had more luck removing it from the back with needle-nose
Vise-Grips. Just grab the small center hole, make sure you have a
good grip, and pull. This step is not reversible. :)
 Obviously you'll also need some LEDs to put in. To start, take your 7
LEDs and file off the mounting ridge on the bottom. If you leave it
on, it makes the cluster just a little too wide to fit in the
flashlight.
Obviously you'll also need some LEDs to put in. To start, take your 7
LEDs and file off the mounting ridge on the bottom. If you leave it
on, it makes the cluster just a little too wide to fit in the
flashlight.
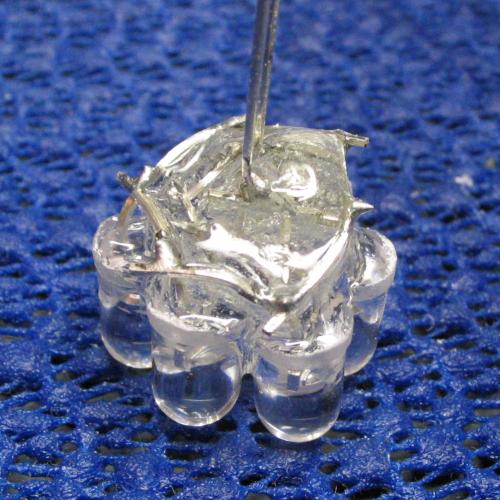
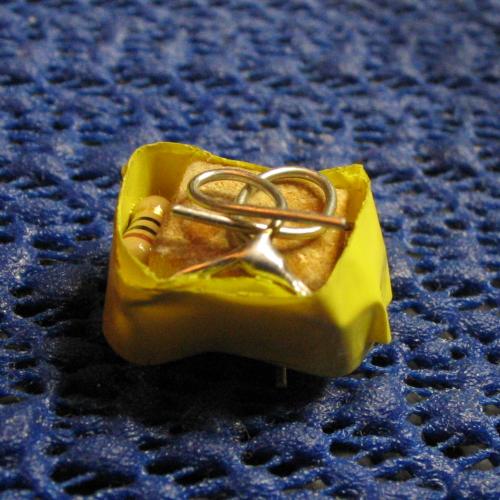
Next you'll need to solder the LEDs together. I start with the center one whose leads will be left unbent. Then, add one to the side of it, bending over the leads fairly close to the LED and soldering them to the center one. Add a third LED next to the second, and attach it to the second LED (not directly to the center one). As you add the LEDs, rotate them so that the negative lead is closer to the center (or the other way around). This makes it easier to keep the negative and positive leads away from each other.
Move around in a circle, attaching each LED to the one before it. You'll have an inner ring of negative connections and an outer ring of positive connections. When you get to the last one, also attach it to the first one in the outer ring. I also try to keep the negative and positive leads at a slightly different height to help separate them.
Once they're all connected, clip off the extra wire with diagonal
cutters. Then adjust them until the beams converge by bending the
leads. I found the easiest way to do this was to light them dimly, so
they were just barely visible, and look directly at them. Once
they're adjusted, epoxy them so that they stay that way.
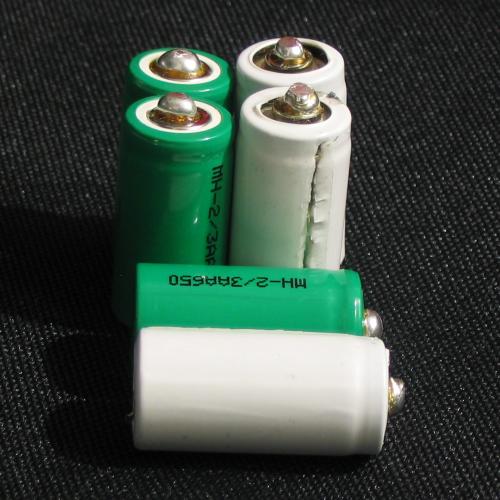 Some batteries are required to power the modified light. You might be
able to use 1.7v lithium batteries, depending on your LEDs, but I
wanted rechargeables, and that meant 3 2/3AAs.
Some batteries are required to power the modified light. You might be
able to use 1.7v lithium batteries, depending on your LEDs, but I
wanted rechargeables, and that meant 3 2/3AAs.
Something to be aware of is that not all 2/3AA batteries are actually the same size. The white batteries in the picture are 2/3AA NiCDs scavenged from an old cordless phone battery pack. The green ones are 2/3AA NiMH batteries from batteryspace.com. As you can see, the former are noticeably longer than the latter.
One thing that 2/3AA do tend to have in common, however, is that they're flat at the positive end instead of having a smaller diameter tip like normal AA batteries. Thus, you'll need to provide your own. I've done this with a blob of solder, as you can see in the pictures. You can vary the size of this solder blob to help compensate for the length of the batteries.
If you don't have a suitable holder for recharging the batteries,
you can do it in the flashlight by taking out the LEDs and connecting
wires to the supply power. You'll still need a fairly flexible
charging circuit, though, to deliver power suitable for three
cells in series. I use a general-purpose regulated and
current-limited bench power supply.
 When I first had the idea for this modification, I had some LEDs which
drew 20 mA at 3.4 V. I decided this was close enough to the 3.6 V
that the batteries would provide that I could use them without any
sort of resistor or current limiter. However, I used up those LEDs on
other projects, and when I got around to making this flashlight, I had
a new batch of LEDs which drew 20 mA at 3.1 V. That was too low a
voltage to run them straight off of the 3.6 V from the batteries, and
the batteries I had were short enough that a spacer was required
anyway, so I put in a resistor.
When I first had the idea for this modification, I had some LEDs which
drew 20 mA at 3.4 V. I decided this was close enough to the 3.6 V
that the batteries would provide that I could use them without any
sort of resistor or current limiter. However, I used up those LEDs on
other projects, and when I got around to making this flashlight, I had
a new batch of LEDs which drew 20 mA at 3.1 V. That was too low a
voltage to run them straight off of the 3.6 V from the batteries, and
the batteries I had were short enough that a spacer was required
anyway, so I put in a resistor.
This ghetto spacer is made from a small piece of dowel with a
resistor glued to each side (I didn't have quite the right value, so I
used two in parallel). Their leads are bent over and soldered
together to form the contacts, and there's tape around the outside to
stop them from shorting to the flashlight wall.
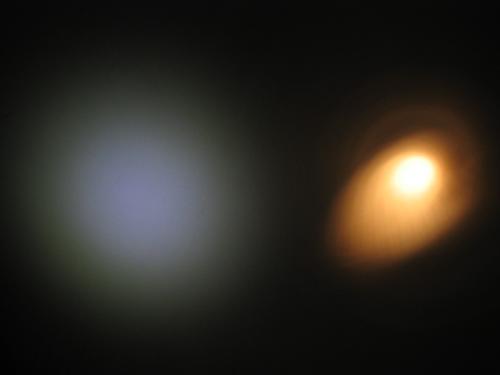 That's about all there is to it. Once all the parts are made and the
epoxy has hardened, put it together and enjoy! The picture to the
right shows the beam from the completed flashlight compared to a beam
from a 2-AA Maglite, which is brighter in its hotspot but less even.
That's about all there is to it. Once all the parts are made and the
epoxy has hardened, put it together and enjoy! The picture to the
right shows the beam from the completed flashlight compared to a beam
from a 2-AA Maglite, which is brighter in its hotspot but less even.
All in all I'm very happy with it, although there are some improvements I'd like to make. I'd like to try replacing the simple resistor with an LM311+transistor current regulator. This will require putting some parts on each end of the batteries, with a piece of magnet wire running between them, but the batteries are short enough that there should be enough space to do it. When I finally get around to trying that, I'll update this page with results.
Should you need omnidirectional light for some reason, you can take the spare bulb out of the back of the flashlight and put it in in place of the LEDs. It may be dim, to an extent dependent on your resistor, but it will more or less work if you're in a jam.
If you don't want to deal with 2/3AAs, or want to preserve your
night vision, you can perform a variation on this modification using
red LEDs instead of white. Red LEDs should be fine running directly
from 2 AA NiMH/NiCD batteries. I did this originally as a
proof-of-concept before going ahead with the white version shown here,
and it worked very nicely (it ultimately failed for reasons unrelated
to the LED modification).